React 無痛入門
在一切開始之前
讓我們來寫個遊戲
井字棋 (OX 遊戲) 看起來很適合當我們第一個 React 程式作品!
開始之前可以先看看最終成果。不用擔心那些程式碼看起來像是天書,在這份教學裡我們會一步一步和您一起完成它。
試著玩看看它!也觀察一下回溯的功能是否正確的在盤面上復現歷史。
如果您已經對這個遊戲有了基本的掌握,那就讓我們關掉遊戲分頁然後開始實作它吧!
先修準備
我們假設您對 HTML 及 JavaScript 並不陌生。但即使您在這之前從未使用過它們,下面的教學應該也能讓您大致理解。
如果您想複習 JavaScript,這份文件應該能幫助您。請特別注意我們會使用到新版 JavaScript 規範 - ES6 的技巧。在這篇教學中,我們使用了 arrow functions、 classes、 let 及 const。您可以使用 Babel REPL 來看看 ES6 編譯後的結果。
課程環境需求
這些教學所需的環境您可以直接在線上編輯環境中撰寫執行或在您的電腦設置好開發環境。請選擇一個您覺得方便舒適的方式。
在線上編輯器內操作
這是最快可以開始課程的方式!
首先在新分頁打開這個網址。您應該會看到一個空白的井字期盤面。接下來您就可以遵照這篇教學繼續往下學習了。
請忽略下一個章節「在您的電腦內操作」,直接跳到背景知識。
在您的電腦內操作
這個章節我們將與您分享如何在您的電腦設定環境。請注意,這個章節所敘述的內容和實際如何撰寫 React 程式沒有直接關係,只是讓您能以習慣的編輯器做開發。
如果您要繼續往下,請遵照這兩個步驟:
請協助翻譯「安裝步驟指引」!
npm install -g create-react-app
create-react-app my-app- 刪除位於新專案
src/下的所有檔案。只刪除檔案,src/資料夾請保留。
cd my-app
rm -f src/*-
將這些 CSS 程式碼填入到
src/index.css。 -
將這些 JavaScript 程式碼填入到
src/index.js。 -
打開
src/index.js,並將以下三行加到最頂部:
import React from 'react';
import ReactDOM from 'react-dom';
import './index.css';
緊接著請您在專案根目錄執行 npm start。如此一來,在瀏覽器中瀏覽 http://localhost:3000 將可以看到空的井字棋盤面。
喔對了!我們建議您可以參考這份文件來設定您編輯器的 syntax highlighting。
救命啊!我卡住了!
如果您遇到什麼不可解的問題,請到社群支援看看。此外,Reactiflux chat 也是一個好的發問渠道。
接著,就讓我們開始吧!
背景知識
React 是什麼?
React 是一個用來建構使用者介面的 javascript 函式庫,兼具了聲明式、效能以及彈性。
讓我們先從 React.Component 開始講起:
class ShoppingList extends React.Component {
  render() {
    return (
      <div className="shopping-list">
        <h1>Shopping List for {this.props.name}</h1>
        <ul>
          <li>Instagram</li>
          <li>WhatsApp</li>
          <li>Oculus</li>
        </ul>
      </div>
    );
  }
}

// Example usage: <ShoppingList name="Mark" />
待會我們再來研究那些類 XML 的標籤是怎麼回事。在上面這個元件中,您告訴了 React 如何渲染畫面,它將在資料變動時高效的重繪畫面。
在這裡,ShoppingList 是一個 React component class,或者我們也可以稱之為 React component type。一個元件藉由 props 裡的資料並按照 render 的描述繪製畫面。
render 回傳一個對於畫面的描述讓 React 渲染。精確的說,render 回傳一個輕量的畫面描述 - React element。多數的 React 開發者使用一種類 XML 的特殊語法 - JSX 來組織畫面結構。事實上 <div /> 會被轉換成 React.createElement('div')。看看以下這個範例:
return React.createElement('div', {className: 'shopping-list'},
  React.createElement('h1', /* ... h1 children ... */),
  React.createElement('ul', /* ... ul children ... */)
);如果您對此感到好奇, API 文件有更多細節。在這篇教學中我們只會用到 JSX。
請協助翻譯「API 文件」!
在 JSX 中您可以直接撰寫 JavaScript 程式。事實上,每個 React 元件都是 JavaScript 物件,是以您可以將之儲存在變數之中來運用。
這個 ShoppingList 可以以 <ShoppingList /> 的格式被外部使用,如此一來您就能輕易創建複雜的畫面。
好戲登場
讓我們從這裡開始,
我們已經提供好初步的外殼,您只需要注意 JavaScript 的部分即可。
我們將它拆分成三個部分:
- Square:每一個可被點擊的單一
<button> - Board:含有九個 Square
- Game:含有一個 Board,並加上了其他提示訊息
藉 Props 傳遞資料
現在讓我們試著傳遞一些資料到 Square 內的 Board。
首先將 Board 的 renderSquare 函式,改動一下程式碼以取用來自 Square prop 的 value:
class Board extends React.Component {
  renderSquare(i) {
    return <Square value={i} />;
  }
接著我們將 Square render 中 {/* TODO */} 改為 {this.props.value}:
class Square extends React.Component {
render() {
return (
<button className="square">
{this.props.value}
</button>
);
}
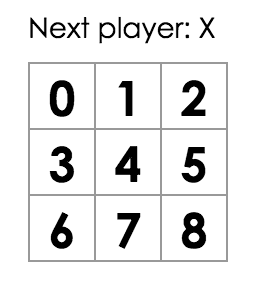
}改變前:
修改後:您將可以發現每個方格都有一個數字:
互動式元件
我們現在試著讓您在按下 Square 元件的按鈕時顯示 “X”:
class Square extends React.Component {
  render() {
    return (
      <button className="square" onClick={() => alert('click')}>
        {this.props.value}
      </button>
    );
  }
}
現在如果您按下按鈕,您會得到一個警示!
在這裡我們使用了 JavaScript 的 arrow function。我們將 alert('click') 傳給 onClick 的參數,這會在您按下按鈕時觸發一個警示視窗。
React 提供 this.state 讓您保留內部狀態 (其初始值在 constructor 中設置)。現在讓我們試著將按下的值儲存在內部。
首先在 constructor 中初始化 state:
class Square extends React.Component {
  constructor(props) {
    super(props);
    this.state = {
      value: null,
    };
  }

  render() {
    return (
      <button className="square" onClick={() => alert('click')}>
        {this.props.value}
      </button>
    );
  }
}
當您使用 JavaScript classes 的 subclass 時,必須明確的在 constructor 呼叫 super()。
現在讓我們重寫 render 的內容:
- 將
<button>內的this.props.value替換成this.state.value - 將
() => alert()替換成() => this.setState({value: 'X'})。
此時 <button> 會變成這樣:
class Square extends React.Component {
  constructor(props) {
    super(props);
    this.state = {
      value: null,
    };
  }

  render() {
    return (
      <button className="square" onClick={() => this.setState({value: 'X'})}>
        {this.state.value}
      </button>
    );
  }
}
this.state 被呼叫時將會重繪物件,這將會使你在畫面上看到 X。
Developer Tools
The React Devtools extension for Chrome and Firefox lets you inspect a React component tree in your browser devtools.
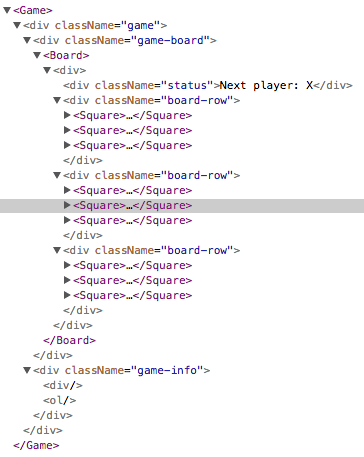
It lets you inspect the props and state of any of the components in your tree.
After installing it, you can right-click any element on the page, click “Inspect” to open the developer tools, and the React tab will appear as the last tab to the right.
However, note there are a few extra steps to get it working with CodePen:
- Log in or register and confirm your email (required to prevent spam).
- Click the “Fork” button.
- Click “Change View” and then choose “Debug mode”.
- In the new tab that opens, the devtools should now have a React tab.
Lifting State Up
We now have the basic building blocks for a tic-tac-toe game. But right now, the state is encapsulated in each Square component. To make a fully-working game, we now need to check if one player has won the game, and alternate placing X and O in the squares. To check if someone has won, we’ll need to have the value of all 9 squares in one place, rather than split up across the Square components.
You might think that Board should just inquire what the current state of each Square is. Although it is technically possible to do this in React, it is discouraged because it tends to make code difficult to understand, more brittle, and harder to refactor.
Instead, the best solution here is to store this state in the Board component instead of in each Square – and the Board component can tell each Square what to display, like how we made each square display its index earlier.
When you want to aggregate data from multiple children or to have two child components communicate with each other, move the state upwards so that it lives in the parent component. The parent can then pass the state back down to the children via props, so that the child components are always in sync with each other and with the parent.
Pulling state upwards like this is common when refactoring React components, so let’s take this opportunity to try it out. Add a constructor to the Board and set its initial state to contain an array with 9 nulls, corresponding to the 9 squares:
class Board extends React.Component {
  constructor(props) {
    super(props);
    this.state = {
      squares: Array(9).fill(null),
    };
  }

  renderSquare(i) {
    return <Square value={i} />;
  }

  render() {
    const status = 'Next player: X';

    return (
      <div>
        <div className="status">{status}</div>
        <div className="board-row">
          {this.renderSquare(0)}
          {this.renderSquare(1)}
          {this.renderSquare(2)}
        </div>
        <div className="board-row">
          {this.renderSquare(3)}
          {this.renderSquare(4)}
          {this.renderSquare(5)}
        </div>
        <div className="board-row">
          {this.renderSquare(6)}
          {this.renderSquare(7)}
          {this.renderSquare(8)}
        </div>
      </div>
    );
  }
}
We’ll fill it in later so that a board looks something like
[
  'O', null, 'X',
  'X', 'X', 'O',
  'O', null, null,
]
Board’s renderSquare method currently looks like this:
  renderSquare(i) {
    return <Square value={i} />;
  }
Modify it to pass a value prop to Square.
  renderSquare(i) {
    return <Square value={this.state.squares[i]} />;
}Now we need to change what happens when a square is clicked. The Board component now stores which squares are filled, which means we need some way for Square to update the state of Board. Since component state is considered private, we can’t update Board’s state directly from Square.
The usual pattern here is pass down a function from Board to Square that gets called when the square is clicked. Change renderSquare in Board again so that it reads:
  renderSquare(i) {
    return (
      <Square
        value={this.state.squares[i]}
        onClick={() => this.handleClick(i)}
      />
    );
  }
We split the returned element into multiple lines for readability, and added parentheses around it so that JavaScript doesn’t insert a semicolon after return and break our code.
Now we’re passing down two props from Board to Square: value and onClick. The latter is a function that Square can call. Let’s make the following changes to Square:
- Replace
this.state.valuewiththis.props.valuein Square’srender. - Replace
this.setState()withthis.props.onClick()in Square’srender. - Delete
constructordefinition from Square because it doesn’t have state anymore.
After these changes, the whole Square component looks like this:
class Square extends React.Component {
  render() {
    return (
      <button className="square" onClick={() => this.props.onClick()}>
        {this.props.value}
      </button>
    );
  }
}
Now when the square is clicked, it calls the onClick function that was passed by Board. Let’s recap what happens here:
- The
onClickprop on the built-in DOM<button>component tells React to set up a click event listener. - When the button is clicked, React will call the
onClickevent handler defined in Square’srender()method. - This event handler calls
this.props.onClick(). Square’s props were specified by the Board. - Board passed
onClick={() => this.handleClick(i)}to Square, so, when called, it runsthis.handleClick(i)on the Board. - We have not defined the
handleClick()method on the Board yet, so the code crashes.
Note that DOM <button> element’s onClick attribute has a special meaning to React, but we could have named Square’s onClick prop or Board’s handleClick method differently. It is, however, conventional in React apps to use on* names for the attributes and handle* for the handler methods.
Try clicking a square – you should get an error because we haven’t defined handleClick yet. Add it to the Board class.
class Board extends React.Component {
  constructor(props) {
    super(props);
    this.state = {
      squares: Array(9).fill(null),
    };
  }

  handleClick(i) {
    const squares = this.state.squares.slice();
    squares[i] = 'X';
    this.setState({squares: squares});
  }

  renderSquare(i) {
    return (
      <Square
        value={this.state.squares[i]}
        onClick={() => this.handleClick(i)}
      />
    );
  }

  render() {
    const status = 'Next player: X';

    return (
      <div>
        <div className="status">{status}</div>
        <div className="board-row">
          {this.renderSquare(0)}
          {this.renderSquare(1)}
          {this.renderSquare(2)}
        </div>
        <div className="board-row">
          {this.renderSquare(3)}
          {this.renderSquare(4)}
          {this.renderSquare(5)}
        </div>
        <div className="board-row">
          {this.renderSquare(6)}
          {this.renderSquare(7)}
          {this.renderSquare(8)}
        </div>
      </div>
    );
  }
}We call .slice() to copy the squares array instead of mutating the existing array. Jump ahead a section to learn why immutability is important.
Now you should be able to click in squares to fill them again, but the state is stored in the Board component instead of in each Square, which lets us continue building the game. Note how whenever Board’s state changes, the Square components rerender automatically.
Square no longer keeps its own state; it receives its value from its parent Board and informs its parent when it’s clicked. We call components like this controlled components.
Why Immutability Is Important
In the previous code example, we suggest using the .slice() operator to copy the squares array prior to making changes and to prevent mutating the existing array. Let’s talk about what this means and why it is an important concept to learn.
There are generally two ways for changing data. The first method is to mutate the data by directly changing the values of a variable. The second method is to replace the data with a new copy of the object that also includes desired changes.
Data change with mutation
var player = {score: 1, name: 'Jeff'};
player.score = 2;
// Now player is {score: 2, name: 'Jeff'}
Data change without mutation
var player = {score: 1, name: 'Jeff'};

var newPlayer = Object.assign({}, player, {score: 2});
// Now player is unchanged, but newPlayer is {score: 2, name: 'Jeff'}

// Or if you are using object spread syntax proposal, you can write:
// var newPlayer = {...player, score: 2};
The end result is the same but by not mutating (or changing the underlying data) directly we now have an added benefit that can help us increase component and overall application performance.
Easier Undo/Redo and Time Travel
Immutability also makes some complex features much easier to implement. For example, further in this tutorial we will implement time travel between different stages of the game. Avoiding data mutations lets us keep a reference to older versions of the data, and switch between them if we need to.
Tracking Changes
Determining if a mutated object has changed is complex because changes are made directly to the object. This then requires comparing the current object to a previous copy, traversing the entire object tree, and comparing each variable and value. This process can become increasingly complex.
Determining how an immutable object has changed is considerably easier. If the object being referenced is different from before, then the object has changed. That’s it.
Determining When to Re-render in React
The biggest benefit of immutability in React comes when you build simple pure components. Since immutable data can more easily determine if changes have been made, it also helps to determine when a component requires being re-rendered.
To learn more about shouldComponentUpdate() and how you can build pure components take a look at Optimizing Performance.
Functional Components
We’ve removed the constructor, and in fact, React supports a simpler syntax called functional components for component types like Square that only consist of a render method. Rather than define a class extending React.Component, simply write a function that takes props and returns what should be rendered.
Replace the whole Square class with this function:
function Square(props) {
  return (
    <button className="square" onClick={props.onClick}>
      {props.value}
    </button>
  );
}
You’ll need to change this.props to props both times it appears. Many components in your apps will be able to be written as functional components: these components tend to be easier to write and React will optimize them more in the future.
While we’re cleaning up the code, we also changed onClick={() => props.onClick()} to just onClick={props.onClick}, as passing the function down is enough for our example. Note that onClick={props.onClick()} would not work because it would call props.onClick immediately instead of passing it down.
Taking Turns
An obvious defect in our game is that only X can play. Let’s fix that.
Let’s default the first move to be by ‘X’. Modify our starting state in our Board constructor:
class Board extends React.Component {
  constructor(props) {
    super(props);
    this.state = {
      squares: Array(9).fill(null),
      xIsNext: true,
    };
  }
Each time we move we shall toggle xIsNext by flipping the boolean value and saving the state. Now update Board’s handleClick function to flip the value of xIsNext:
  handleClick(i) {
    const squares = this.state.squares.slice();
    squares[i] = this.state.xIsNext ? 'X' : 'O';
    this.setState({
      squares: squares,
      xIsNext: !this.state.xIsNext,
    });
  }
Now X and O take turns. Next, change the “status” text in Board’s render so that it also displays who is next:
  render() {
    const status = 'Next player: ' + (this.state.xIsNext ? 'X' : 'O');

    return (
      // the rest has not changed
After these changes you should have this Board component:
class Board extends React.Component {
  constructor(props) {
    super(props);
    this.state = {
      squares: Array(9).fill(null),
      xIsNext: true,
    };
  }

  handleClick(i) {
    const squares = this.state.squares.slice();
    squares[i] = this.state.xIsNext ? 'X' : 'O';
    this.setState({
      squares: squares,
      xIsNext: !this.state.xIsNext,
    });
  }

  renderSquare(i) {
    return (
      <Square
        value={this.state.squares[i]}
        onClick={() => this.handleClick(i)}
      />
    );
  }

  render() {
    const status = 'Next player: ' + (this.state.xIsNext ? 'X' : 'O');

    return (
      <div>
        <div className="status">{status}</div>
        <div className="board-row">
          {this.renderSquare(0)}
          {this.renderSquare(1)}
          {this.renderSquare(2)}
        </div>
        <div className="board-row">
          {this.renderSquare(3)}
          {this.renderSquare(4)}
          {this.renderSquare(5)}
        </div>
        <div className="board-row">
          {this.renderSquare(6)}
          {this.renderSquare(7)}
          {this.renderSquare(8)}
        </div>
      </div>
    );
  }
}Declaring a Winner
Let’s show when a game is won. Add this helper function to the end of the file:
function calculateWinner(squares) {
  const lines = [
    [0, 1, 2],
    [3, 4, 5],
    [6, 7, 8],
    [0, 3, 6],
    [1, 4, 7],
    [2, 5, 8],
    [0, 4, 8],
    [2, 4, 6],
  ];
  for (let i = 0; i < lines.length; i++) {
    const [a, b, c] = lines[i];
    if (squares[a] && squares[a] === squares[b] && squares[a] === squares[c]) {
      return squares[a];
    }
  }
  return null;
}
You can call it in Board’s render function to check if anyone has won the game and make the status text show “Winner: [X/O]” when someone wins.
Replace the status declaration in Board’s render with this code:
  render() {
    const winner = calculateWinner(this.state.squares);
    let status;
    if (winner) {
      status = 'Winner: ' + winner;
    } else {
      status = 'Next player: ' + (this.state.xIsNext ? 'X' : 'O');
    }

    return (
      // the rest has not changed
You can now change handleClick in Board to return early and ignore the click if someone has already won the game or if a square is already filled:
  handleClick(i) {
    const squares = this.state.squares.slice();
    if (calculateWinner(squares) || squares[i]) {
      return;
    }
    squares[i] = this.state.xIsNext ? 'X' : 'O';
    this.setState({
      squares: squares,
      xIsNext: !this.state.xIsNext,
    });
  }
Congratulations! You now have a working tic-tac-toe game. And now you know the basics of React. So you’re probably the real winner here.
Storing a History
Let’s make it possible to revisit old states of the board so we can see what it looked like after any of the previous moves. We’re already creating a new squares array each time a move is made, which means we can easily store the past board states simultaneously.
Let’s plan to store an object like this in state:
history = [
  {
    squares: [
      null, null, null,
      null, null, null,
      null, null, null,
    ]
  },
  {
    squares: [
      null, null, null,
      null, 'X', null,
      null, null, null,
    ]
  },
  // ...
]
We’ll want the top-level Game component to be responsible for displaying the list of moves. So just as we pulled the state up before from Square into Board, let’s now pull it up again from Board into Game – so that we have all the information we need at the top level.
First, set up the initial state for Game by adding a constructor to it:
class Game extends React.Component {
  constructor(props) {
    super(props);
    this.state = {
      history: [{
        squares: Array(9).fill(null),
      }],
      xIsNext: true,
    };
  }

  render() {
    return (
      <div className="game">
        <div className="game-board">
          <Board />
        </div>
        <div className="game-info">
          <div>{/* status */}</div>
          <ol>{/* TODO */}</ol>
        </div>
      </div>
    );
  }
}
Then change Board so that it takes squares via props and has its own onClick prop specified by Game, like the transformation we made for Square earlier. You can pass the location of each square into the click handler so that we still know which square was clicked. Here is a list of steps you need to do:
- Delete the
constructorin Board. - Replace
this.state.squares[i]withthis.props.squares[i]in Board’srenderSquare. - Replace
this.handleClick(i)withthis.props.onClick(i)in Board’srenderSquare.
Now the whole Board component looks like this:
class Board extends React.Component {
  handleClick(i) {
    const squares = this.state.squares.slice();
    if (calculateWinner(squares) || squares[i]) {
      return;
    }
    squares[i] = this.state.xIsNext ? 'X' : 'O';
    this.setState({
      squares: squares,
      xIsNext: !this.state.xIsNext,
    });
  }

  renderSquare(i) {
    return (
      <Square
        value={this.props.squares[i]}
        onClick={() => this.props.onClick(i)}
      />
    );
  }

  render() {
    const winner = calculateWinner(this.state.squares);
    let status;
    if (winner) {
      status = 'Winner: ' + winner;
    } else {
      status = 'Next player: ' + (this.state.xIsNext ? 'X' : 'O');
    }

    return (
      <div>
        <div className="status">{status}</div>
        <div className="board-row">
          {this.renderSquare(0)}
          {this.renderSquare(1)}
          {this.renderSquare(2)}
        </div>
        <div className="board-row">
          {this.renderSquare(3)}
          {this.renderSquare(4)}
          {this.renderSquare(5)}
        </div>
        <div className="board-row">
          {this.renderSquare(6)}
          {this.renderSquare(7)}
          {this.renderSquare(8)}
        </div>
      </div>
    );
  }
}
Game’s render should look at the most recent history entry and can take over calculating the game status:
  render() {
    const history = this.state.history;
    const current = history[history.length - 1];
    const winner = calculateWinner(current.squares);

    let status;
    if (winner) {
      status = 'Winner: ' + winner;
    } else {
      status = 'Next player: ' + (this.state.xIsNext ? 'X' : 'O');
    }

    return (
      <div className="game">
        <div className="game-board">
          <Board
            squares={current.squares}
            onClick={(i) => this.handleClick(i)}
          />
        </div>
        <div className="game-info">
          <div>{status}</div>
          <ol>{/* TODO */}</ol>
        </div>
      </div>
    );
  }
Since Game is now rendering the status, we can delete <div className="status">{status}</div> and the code calculating the status from the Board’s render function:
  render() {
    return (
      <div>
        <div className="board-row">
          {this.renderSquare(0)}
          {this.renderSquare(1)}
          {this.renderSquare(2)}
        </div>
        <div className="board-row">
          {this.renderSquare(3)}
          {this.renderSquare(4)}
          {this.renderSquare(5)}
        </div>
        <div className="board-row">
          {this.renderSquare(6)}
          {this.renderSquare(7)}
          {this.renderSquare(8)}
        </div>
      </div>
    );
  }
Next, we need to move the handleClick method implementation from Board to Game. You can cut it from the Board class, and paste it into the Game class.
We also need to change it a little, since Game state is structured differently. Game’s handleClick can push a new entry onto the stack by concatenating the new history entry to make a new history array.
  handleClick(i) {
    const history = this.state.history;
    const current = history[history.length - 1];
    const squares = current.squares.slice();
    if (calculateWinner(squares) || squares[i]) {
      return;
    }
    squares[i] = this.state.xIsNext ? 'X' : 'O';
    this.setState({
      history: history.concat([{
        squares: squares,
      }]),
      xIsNext: !this.state.xIsNext,
    });
  }
At this point, Board only needs renderSquare and render; the state initialization and click handler should both live in Game.
Showing the Moves
Let’s show the previous moves made in the game so far. We learned earlier that React elements are first-class JS objects and we can store them or pass them around. To render multiple items in React, we pass an array of React elements. The most common way to build that array is to map over your array of data. Let’s do that in the render method of Game:
  render() {
    const history = this.state.history;
    const current = history[history.length - 1];
    const winner = calculateWinner(current.squares);

    const moves = history.map((step, move) => {
      const desc = move ?
        'Go to move #' + move :
        'Go to game start';
      return (
        <li>
          <button onClick={() => this.jumpTo(move)}>{desc}</button>
        </li>
      );
    });

    let status;
    if (winner) {
      status = 'Winner: ' + winner;
    } else {
      status = 'Next player: ' + (this.state.xIsNext ? 'X' : 'O');
    }

    return (
      <div className="game">
        <div className="game-board">
          <Board
            squares={current.squares}
            onClick={(i) => this.handleClick(i)}
          />
        </div>
        <div className="game-info">
          <div>{status}</div>
          <ol>{moves}</ol>
        </div>
      </div>
    );
}For each step in the history, we create a list item <li> with a button <button> inside it that has a click handler which we’ll implement shortly. With this code, you should see a list of the moves that have been made in the game, along with a warning that says:
Warning: Each child in an array or iterator should have a unique “key” prop. Check the render method of “Game”.
Let’s talk about what that warning means.
Keys
When you render a list of items, React always stores some info about each item in the list. If you render a component that has state, that state needs to be stored – and regardless of how you implement your components, React stores a reference to the backing native views.
When you update that list, React needs to determine what has changed. You could’ve added, removed, rearranged, or updated items in the list.
Imagine transitioning from
<li>Alexa: 7 tasks left</li>
<li>Ben: 5 tasks left</li>
to
<li>Ben: 9 tasks left</li>
<li>Claudia: 8 tasks left</li>
<li>Alexa: 5 tasks left</li>
To a human eye, it looks likely that Alexa and Ben swapped places and Claudia was added – but React is just a computer program and doesn’t know what you intended it to do. As a result, React asks you to specify a key property on each element in a list, a string to differentiate each component from its siblings. In this case, alexa, ben, claudia might be sensible keys; if the items correspond to objects in a database, the database ID is usually a good choice:
<li key={user.id}>{user.name}: {user.taskCount} tasks left</li>key is a special property that’s reserved by React (along with ref, a more advanced feature). When an element is created, React pulls off the key property and stores the key directly on the returned element. Even though it may look like it is part of props, it cannot be referenced with this.props.key. React uses the key automatically while deciding which children to update; there is no way for a component to inquire about its own key.
When a list is rerendered, React takes each element in the new version and looks for one with a matching key in the previous list. When a key is added to the set, a component is created; when a key is removed, a component is destroyed. Keys tell React about the identity of each component, so that it can maintain the state across rerenders. If you change the key of a component, it will be completely destroyed and recreated with a new state.
It’s strongly recommended that you assign proper keys whenever you build dynamic lists. If you don’t have an appropriate key handy, you may want to consider restructuring your data so that you do.
If you don’t specify any key, React will warn you and fall back to using the array index as a key – which is not the correct choice if you ever reorder elements in the list or add/remove items anywhere but the bottom of the list. Explicitly passing key={i} silences the warning but has the same problem so isn’t recommended in most cases.
Component keys don’t need to be globally unique, only unique relative to the immediate siblings.
Implementing Time Travel
For our move list, we already have a unique ID for each step: the number of the move when it happened. In the Game’s render method, add the key as <li key={move}> and the key warning should disappear:
    const moves = history.map((step, move) => {
      const desc = move ?
        'Go to move #' + move :
        'Go to game start';
      return (
        <li key={move}>
          <button onClick={() => this.jumpTo(move)}>{desc}</button>
        </li>
      );
});Clicking any of the move buttons throws an error because jumpTo is undefined. Let’s add a new key to Game’s state to indicate which step we’re currently viewing.
First, add stepNumber: 0 to the initial state in Game’s constructor:
class Game extends React.Component {
  constructor(props) {
    super(props);
    this.state = {
      history: [{
        squares: Array(9).fill(null),
      }],
      stepNumber: 0,
      xIsNext: true,
    };
  }
Next, we’ll define the jumpTo method in Game to update that state. We also want to update xIsNext. We set xIsNext to true if the index of the move number is an even number.
Add a method called jumpTo to the Game class:
  handleClick(i) {
    // this method has not changed
  }

  jumpTo(step) {
    this.setState({
      stepNumber: step,
      xIsNext: (step % 2) === 0,
    });
  }

  render() {
    // this method has not changed
  }
Then update stepNumber when a new move is made by adding stepNumber: history.length to the state update in Game’s handleClick. We’ll also update handleClick to be aware of stepNumber when reading the current board state so that you can go back in time then click in the board to create a new entry:
  handleClick(i) {
    const history = this.state.history.slice(0, this.state.stepNumber + 1);
    const current = history[history.length - 1];
    const squares = current.squares.slice();
    if (calculateWinner(squares) || squares[i]) {
      return;
    }
    squares[i] = this.state.xIsNext ? 'X' : 'O';
    this.setState({
      history: history.concat([{
        squares: squares
      }]),
      stepNumber: history.length,
      xIsNext: !this.state.xIsNext,
    });
  }
Now you can modify Game’s render to read from that step in the history:
  render() {
    const history = this.state.history;
    const current = history[this.state.stepNumber];
    const winner = calculateWinner(current.squares);

// the rest has not changedIf you click any move button now, the board should immediately update to show what the game looked like at that time.
Wrapping Up
Now, you’ve made a tic-tac-toe game that:
- lets you play tic-tac-toe,
- indicates when one player has won the game,
- stores the history of moves during the game,
- allows players to jump back in time to see older versions of the game board.
Nice work! We hope you now feel like you have a decent grasp on how React works.
Check out the final result here: Final Result.
If you have extra time or want to practice your new skills, here are some ideas for improvements you could make, listed in order of increasing difficulty:
- Display the location for each move in the format (col, row) in the move history list.
- Bold the currently selected item in the move list.
- Rewrite Board to use two loops to make the squares instead of hardcoding them.
- Add a toggle button that lets you sort the moves in either ascending or descending order.
- When someone wins, highlight the three squares that caused the win.
- When no one wins, display a message about the result being a draw.
Throughout this tutorial, we have touched on a number of React concepts including elements, components, props, and state. For a more in-depth explanation for each of these topics, check out the rest of the documentation. To learn more about defining components, check out the React.Component API reference.